A Simple Guide to Changing a Flat Tire
Encountering a flat tire on the road can be an unexpected situation. While it may seem daunting, understanding the basic steps involved in changing a tire can help a driver address the issue methodically. The process relies on having the right tools, choosing a safe location, and following a clear sequence of actions. This guide outlines the general procedure for replacing a flat tire, emphasizing safety and preparation at every stage.
Before beginning, it is helpful to note that the exact steps can vary depending on the vehicle model and the type of spare tire system installed. Some vehicles include a full-size spare, while others use a compact temporary spare or a tire repair kit. This guide focuses on the conventional method using a jack and a spare tire, which remains a common approach for many cars. Familiarity with the vehicle’s owner manual is recommended, as it contains specific details about jack points and tire specifications.
The objective here is to provide a neutral, information-based overview of the process. No guarantee of success in every situation is implied, as external factors such as road conditions, weather, and the condition of the spare tire can influence the outcome. The steps described below are intended to support a systematic and cautious approach.
Safety First: Choosing a Suitable Location
The initial consideration when dealing with a flat tire is the safety of the driver, passengers, and other road users. If the vehicle is on a busy highway or an area with limited visibility, it is advisable to move the car to a more secure spot, such as a wide shoulder, a parking lot, or a level surface away from traffic. Activating the hazard lights alerts other drivers to the situation. Engaging the parking brake helps prevent unintended movement. Placing wheel wedges or heavy objects behind the wheels on the opposite side of the flat tire adds an extra layer of stability.
If the flat occurs on a slope or uneven ground, extra caution is necessary. Jacks are designed to operate on firm, level surfaces. Soft ground, gravel, or asphalt under intense heat can compromise the jack’s stability. In such cases, it may be safer to call for roadside assistance rather than attempting a tire change without proper conditions. The decision to proceed should depend on an assessment of the environment and the availability of safe space.
Essential Tools and Equipment
Most vehicles come equipped with a factory-supplied jack, a lug wrench, and a spare tire. It is a good practice to verify that these items are present and in working condition before a trip. The jack should be inspected for any visible damage or rust. The lug wrench often includes a socket that fits the vehicle’s lug nuts, and some designs incorporate a handle that can also serve as a jack lever. The spare tire should be checked periodically for proper inflation pressure, as a flat spare can create additional challenges.
In addition to the standard equipment, a few extra items can support the process. A pair of gloves can protect hands from dirt and sharp edges. A flashlight is useful if the flat occurs in low-light conditions. A portable tire inflator or a can of tire sealant may serve as an alternative to changing the tire, depending on the type of puncture. However, these alternatives are not covered in this guide, which focuses on the mechanical replacement of the tire.
Understanding how to use each tool correctly is part of the preparation. The owner manual often contains diagrams showing the correct jacking points on the vehicle frame. Using the wrong point can damage the vehicle or cause the jack to slip. Taking a moment to review these details before starting can reduce the risk of mistakes.
Step-by-Step Process: From Loosening to Lowering
-
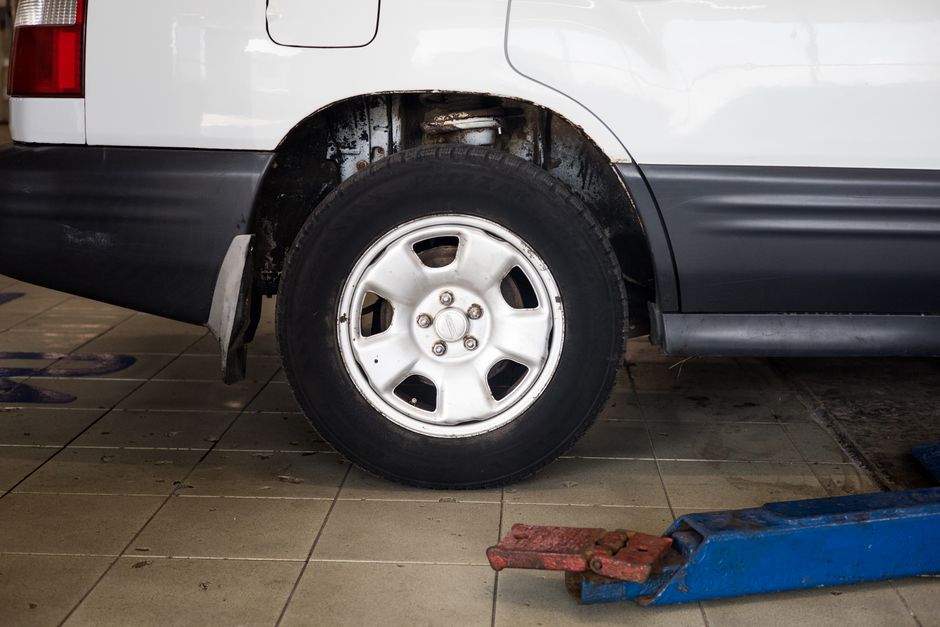
Loosening the lug nuts while the vehicle is still on the ground is a recommended first step. The parking brake should remain engaged. Using the lug wrench, turn each lug nut counterclockwise by about a quarter turn. Do not remove them completely at this stage. Loosening them on the ground prevents the wheel from spinning during the effort. If a nut is too tight, applying gentle pressure with the body weight or using a small length of pipe for additional leverage may help, provided the wrench is designed to handle extra torque.
-
Positioning the jack under the vehicle at the designated jack point comes next. The jack should be placed on a stable, flat area of the ground. Once the jack is correctly positioned, raise it until it contacts the vehicle frame, but do not lift the vehicle yet. Double-check that the jack is aligned and that the base is flat against the ground. Uneven surfaces can be addressed by using a sturdy board under the jack, but only if the board is strong enough and does not shift.
-
Lifting the vehicle requires slow, controlled pumping or turning of the jack handle. The goal is to raise the tire off the ground by a few inches – enough to remove the flat tire and install the spare. Overlifting is unnecessary and can increase instability. After lifting, place the spare tire or a safety stand if available under the vehicle as an additional precaution. However, many drivers proceed without a stand, relying on the jack alone, which is acceptable as long as the vehicle remains stable.
-
Removing the loosened lug nuts entirely and taking off the flat tire follows. Pull the tire straight off the wheel studs. If the tire is stuck, gently tapping the side of the tire with the heel of a foot or using a rubber mallet can break the bond. Avoid striking the wheel rim or brake components. Once the flat tire is off, place it under the vehicle near the jack point as a crude backup support in case the jack fails – this is a common safety practice.
-
Mounting the spare tire involves aligning the holes in the spare with the wheel studs. Slide the spare onto the studs as far as it will go. If the spare does not slide on easily, check that the studs are clean and the spare is oriented correctly. Once in place, screw on the lug nuts by hand, turning them clockwise until snug. Tighten them in a crisscross pattern to ensure even pressure. This pattern typically involves tightening one nut, then the nut opposite it, and so on.
-
Lowering the vehicle back to the ground is done by reversing the jack operation. Lower slowly until the tire makes contact with the ground, but the vehicle weight is not fully on it. At this point, use the lug wrench to tighten the lug nuts further. Many recommend tightening to a specific torque value, which can be found in the owner manual. Since a torque wrench is rarely available during a roadside change, tightening as firmly as possible with the standard wrench is often deemed sufficient for temporary use. After tightening, lower the vehicle completely and remove the jack.
Final Checks and Considerations
Once the vehicle is back on the ground, a final tightening of the lug nuts with the wrench is advisable. Some sources suggest performing this final tightening in the same crisscross sequence to ensure even clamping force. After that, the flat tire and all tools should be stored securely in the vehicle. The spare tire, especially if it is a compact temporary spare, often has a maximum speed rating and should be used only for a limited distance. The vehicle’s handling may feel different with a temporary spare, and it is prudent to drive cautiously until a full-size replacement can be obtained.
It is also worth noting that a spare tire is not a permanent solution. Scheduling a visit to a tire shop or mechanic as soon as possible allows for the flat tire to be repaired or replaced and the spare to be restored to a usable state. Additionally, if the original tire was damaged due to a puncture in the sidewall or a large gash, it may not be repairable and will need to be replaced entirely. Checking the pressure of the newly installed spare tire with a gauge, if available, can confirm it is properly inflated for safe travel.
In summary, changing a flat tire involves a series of deliberate steps that prioritize safety, correct tool use, and careful lifting. By approaching the task methodically and adjusting to the specific conditions of the environment, a driver can manage the situation without unnecessary risk. The process is not inherently complex, but it requires attention to detail and a willingness to stop and reassess if something does not feel right. When in doubt, professional roadside assistance remains a reliable alternative.